Mother of Pearl Shirt Button Sewing Tutorial
Step 1: Removing the Old Button
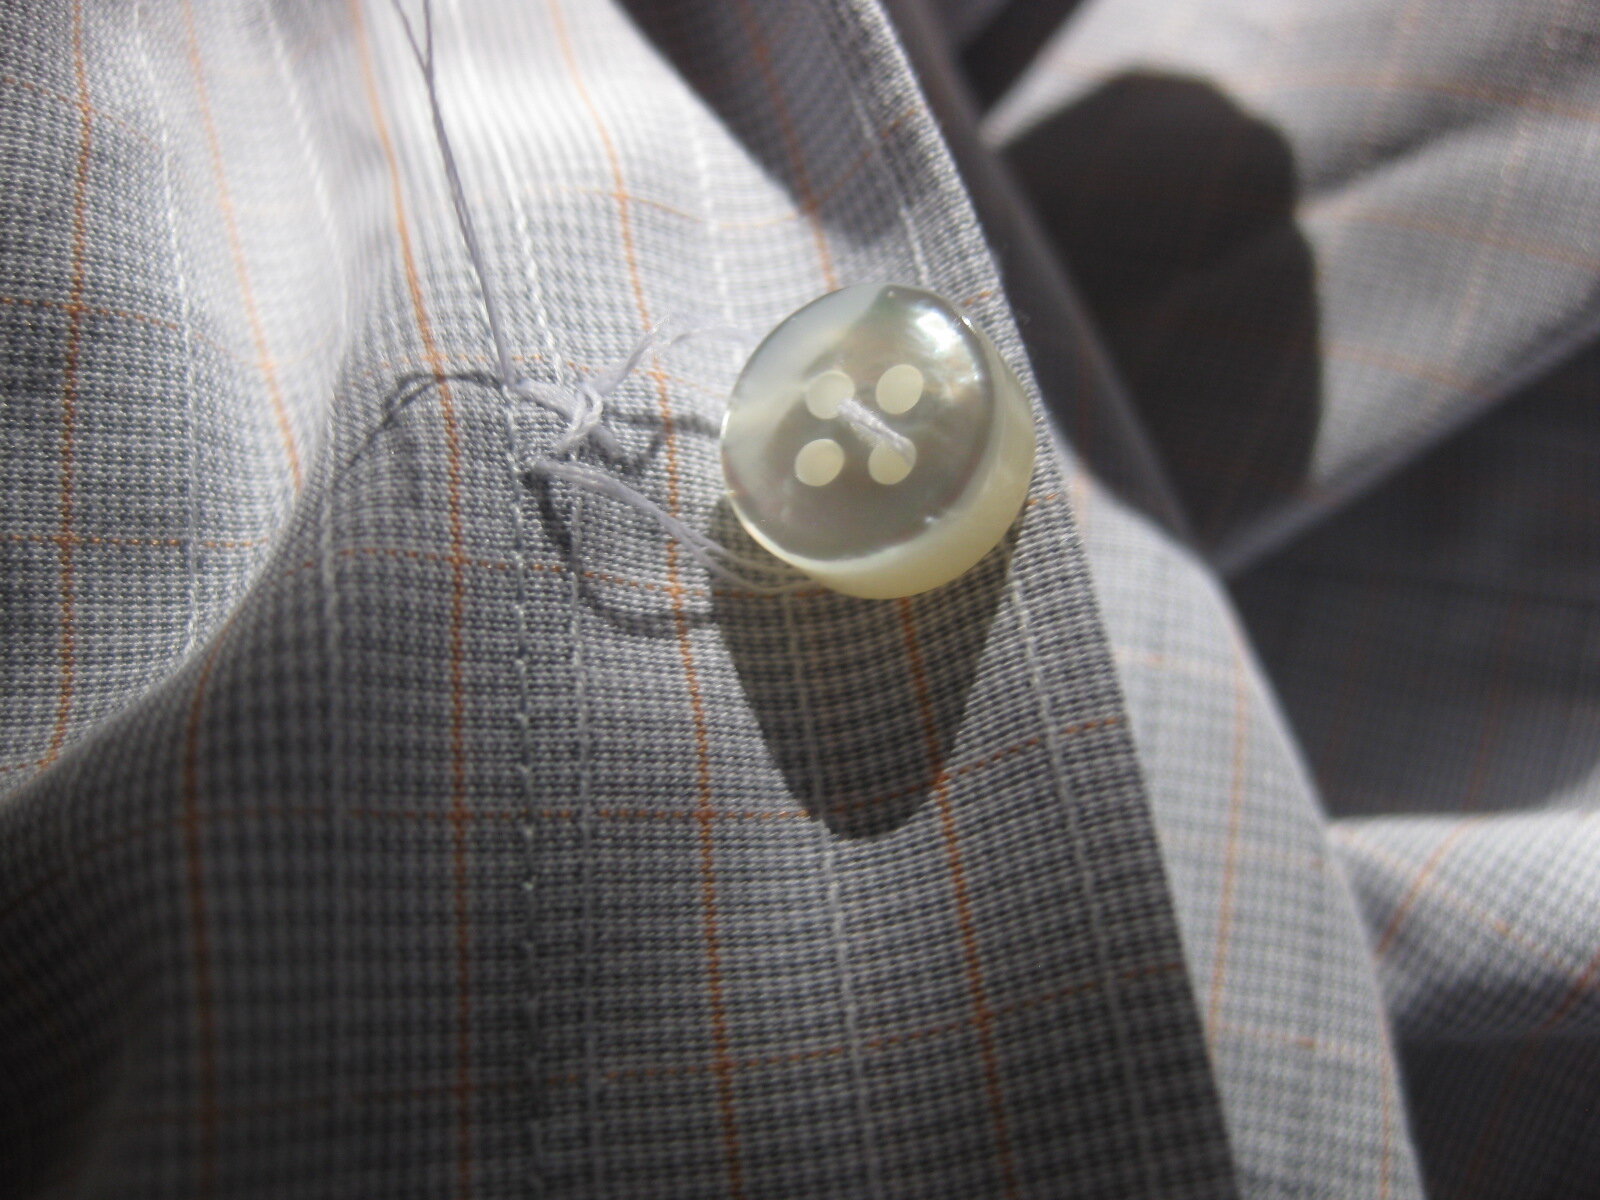
First, if the shirt already has a button in place it will need to be removed.
Use a seam-ripper to carefully cut the threads and pull off the button.
Step 2: Prepare the Thread
Next, thread the needle and make sure to leave about 11 or 12 inches of thread to have extra. Better safe than sorry!
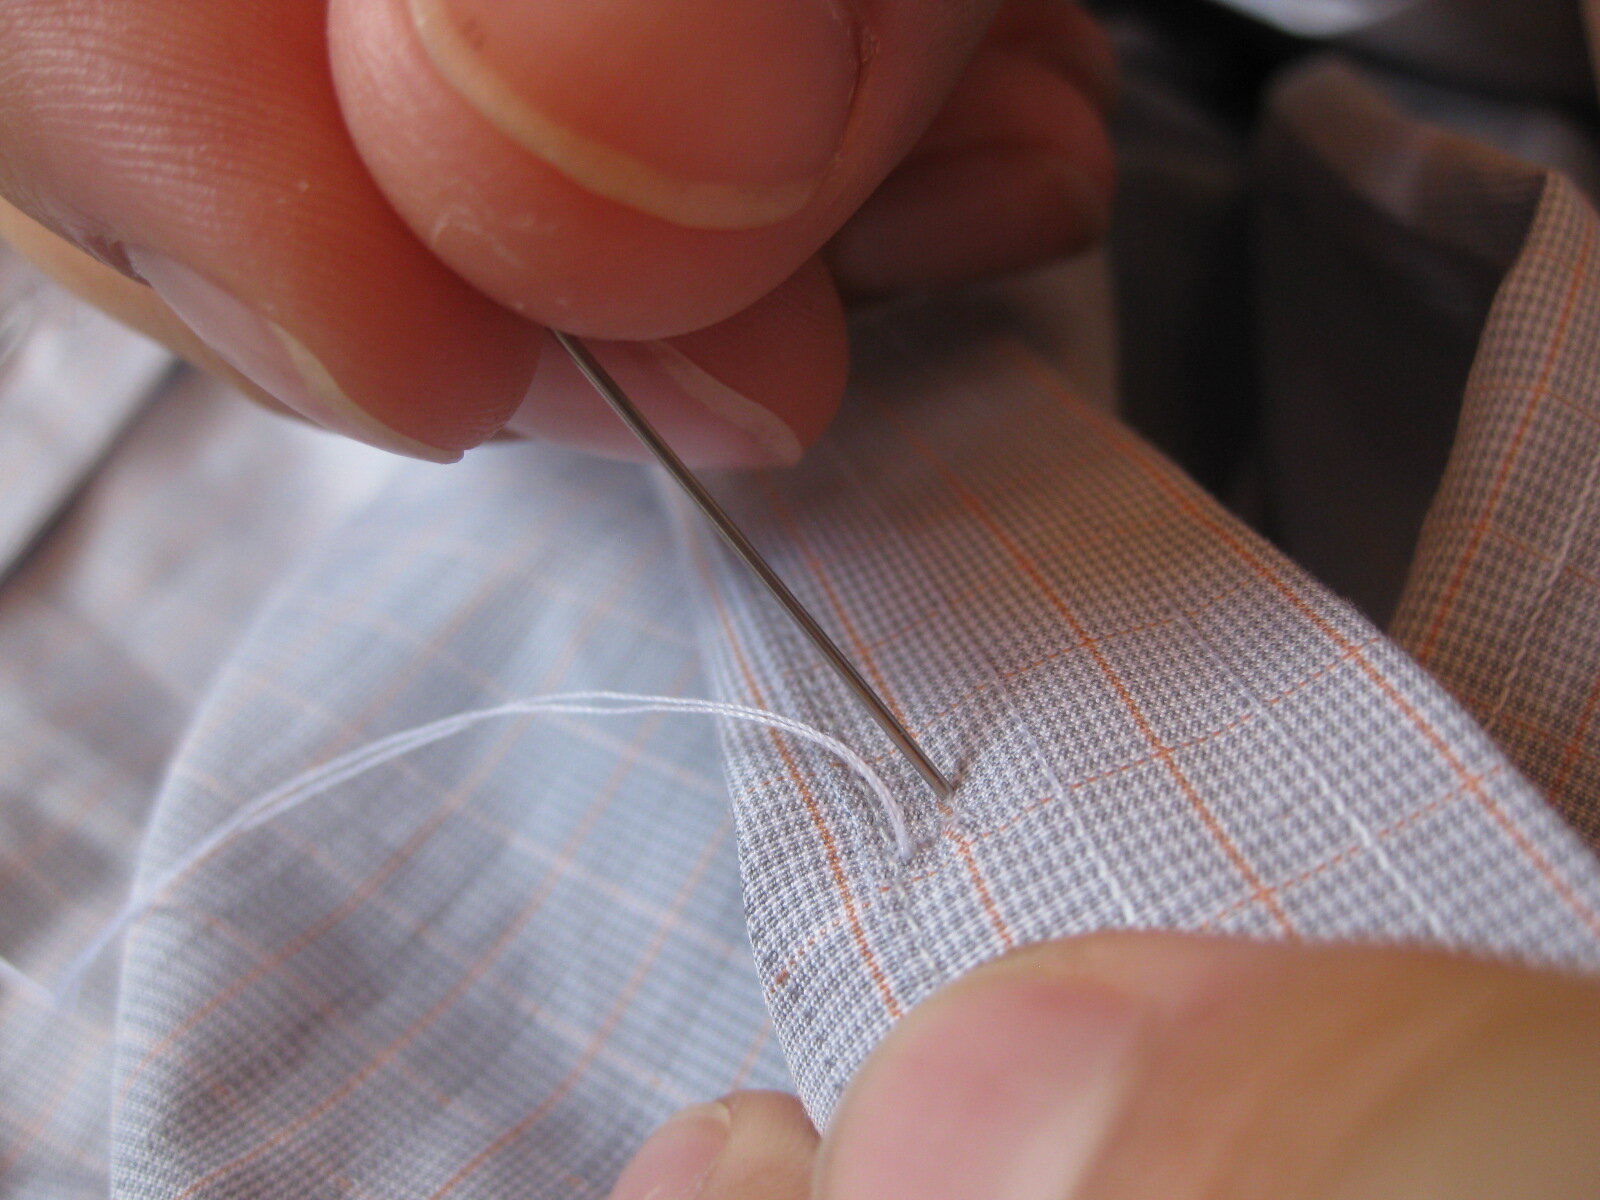
Step 3: Find the Starting Point
It’s time to get started! If this is a new location for a button, you will have needed to mark your desired button centers and now pick a spot that is about 1/16 of an inch away from that center.
If you are replacing an existing button, you are already one step ahead and can reuse the existing holes.
Pick one and insert the needle from the outside of the shirt.

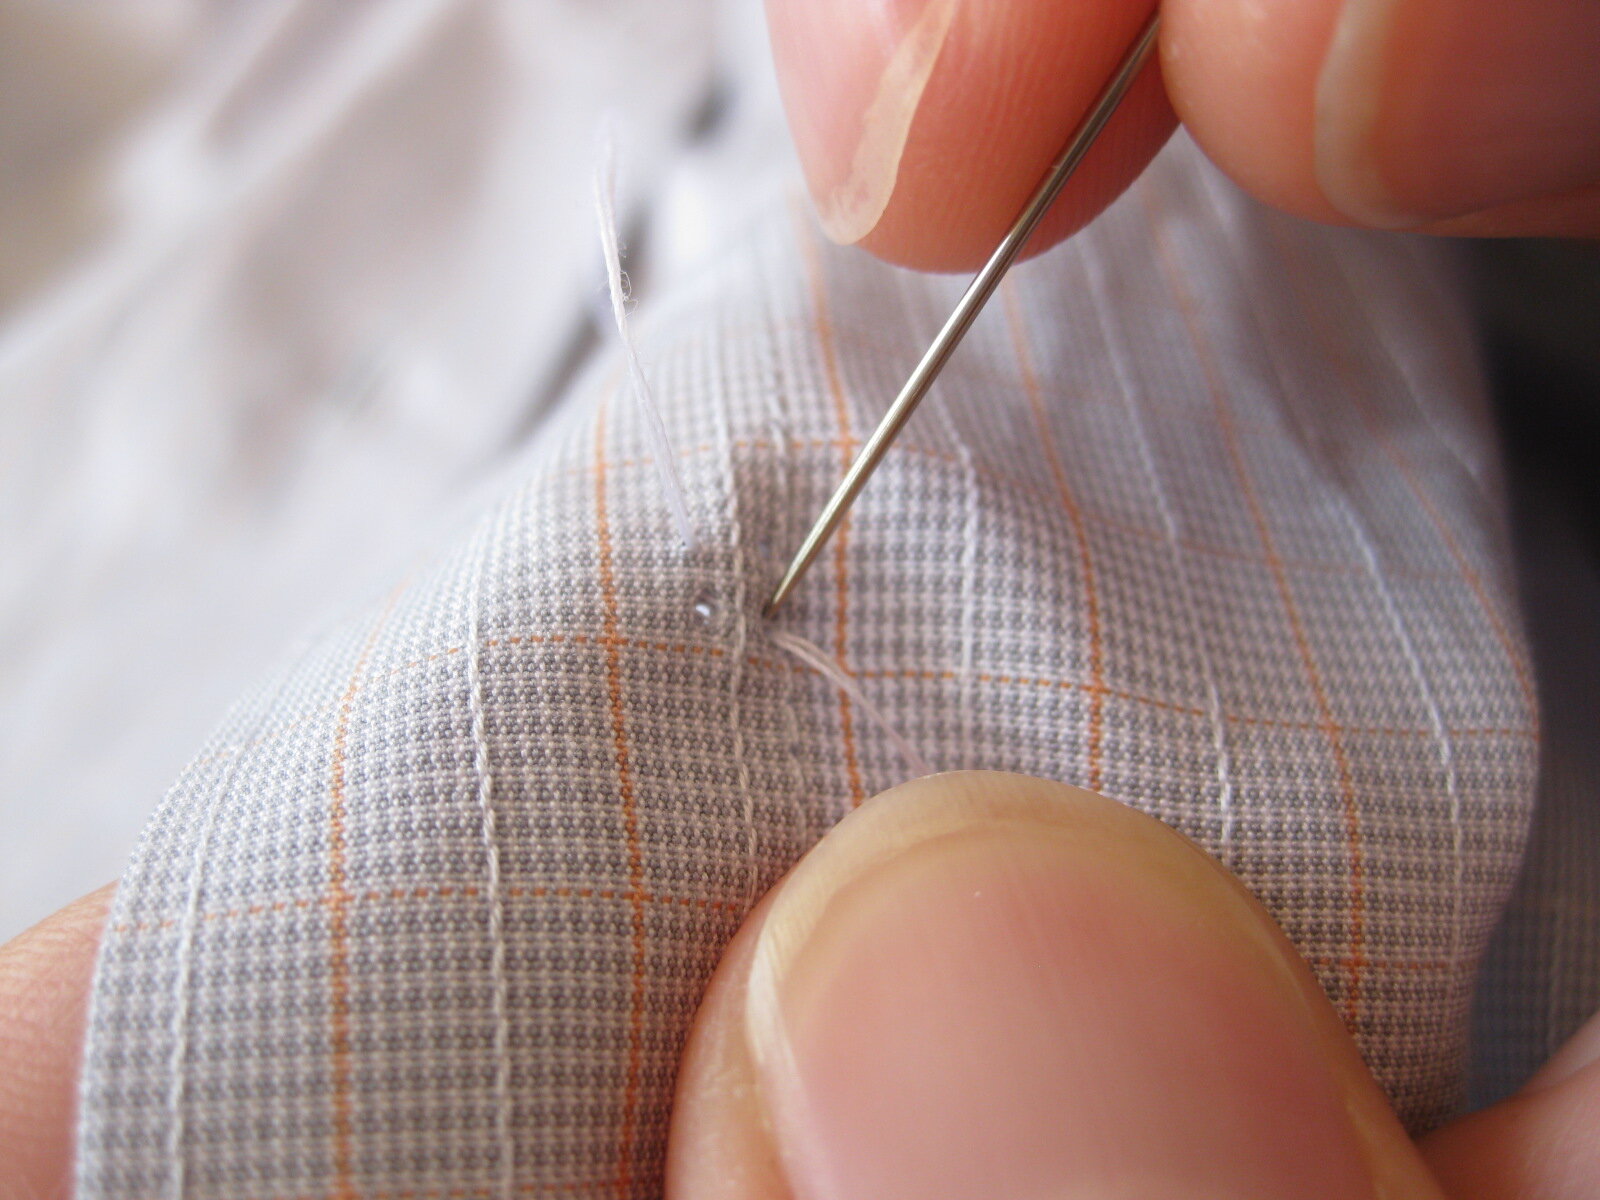
Step 4: Start Threading
Pull the thread through the outside of the shirt until there is only about an inch or a little more left.
Contrary to popular belief, no knots will be needed in this entire process!
Step 5: Making the First Loop
Now on the inside of the shirt, send the needle back through the hole that is diagonal from the first hole.
It will be located about 1/8 inch across.
Keep your thumb or finger holding down the 1 inch of thread left on the outside so you do not accidentally pull it through as you tighten the loop.
Step 6: Second Loop Pass
Back on the outside of the shirt, pull the thread to tighten up the loop and prepare to put the needle back through the original spot again.
Repeat these steps again so that you have made two loops on this same path.

Step 7: Starting the Opposite Loop
This time, while on the inside of the shirt, move 1/16 inch away to one of the unused holes.
Step 8: Opposite Loop
On the outside, thread the needle into the last remaining unused hole, which is diagonal from the one we just used.
Step 9: Starting the Button
Repeat that last step again, only this time once the needle comes up to the outside of the shirt, it is time to get the button started.
Loop the needle through the button and then insert it into the diagonal hole as usual.
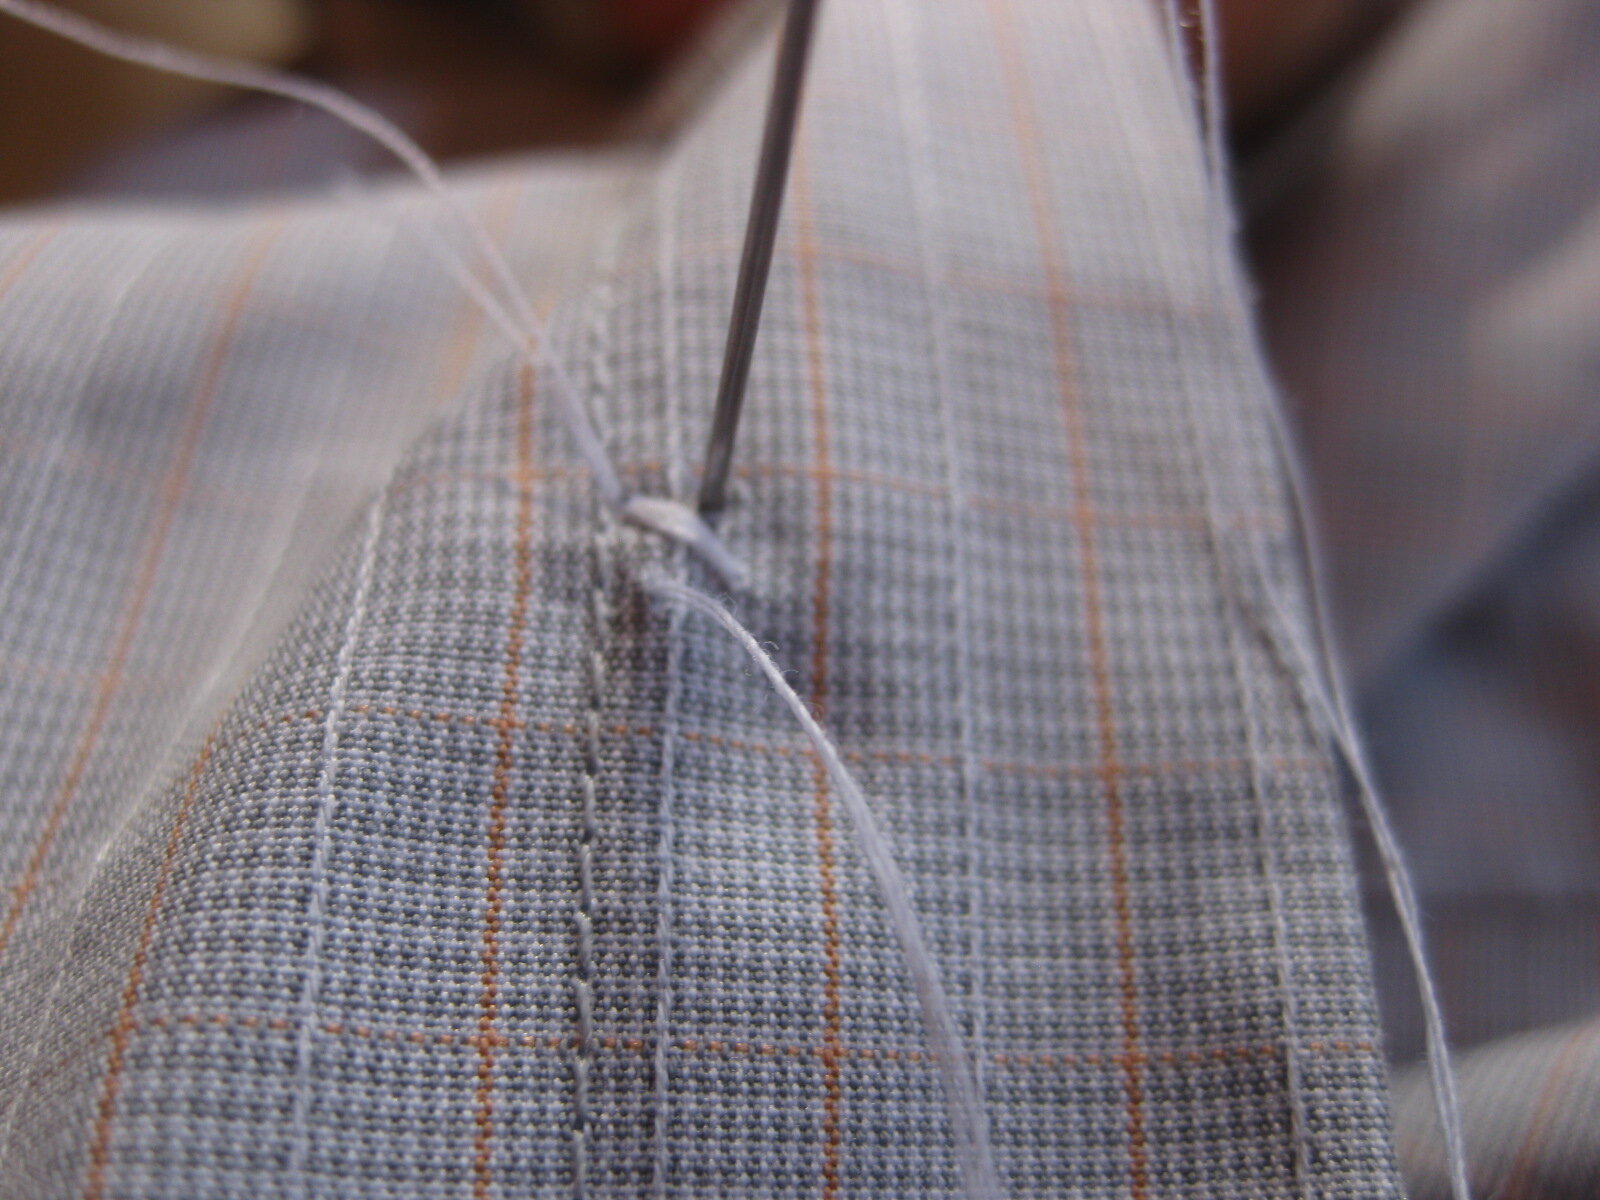
Step 10: Continue to Loop
Repeat that same loop a total of three times, using the same diagonal hole pair.
Pull the thread snug but not overly tight each time, while using your fingers to hold the button just a touch off of the fabric, about 1/16 of an inch or so.
You’ll need a little gap between the fabric and the button for the shank later.
Step 11: Finish the First Button Hole Loop
Here, you can see the needle being inserted from the outside of the shirt as the third loop is being completed for the same diagonal pair of holes.

Step 12: Second Button Hole Loop
The next step is to move over to the other diagonal pair of holes and repeat three loops there as well.

Step 13: Finish the Button Loops
Once you have completed a full three loops through each pair of holes to finish the cross-stitch, your needle and thread should be on the inside of the shirt.
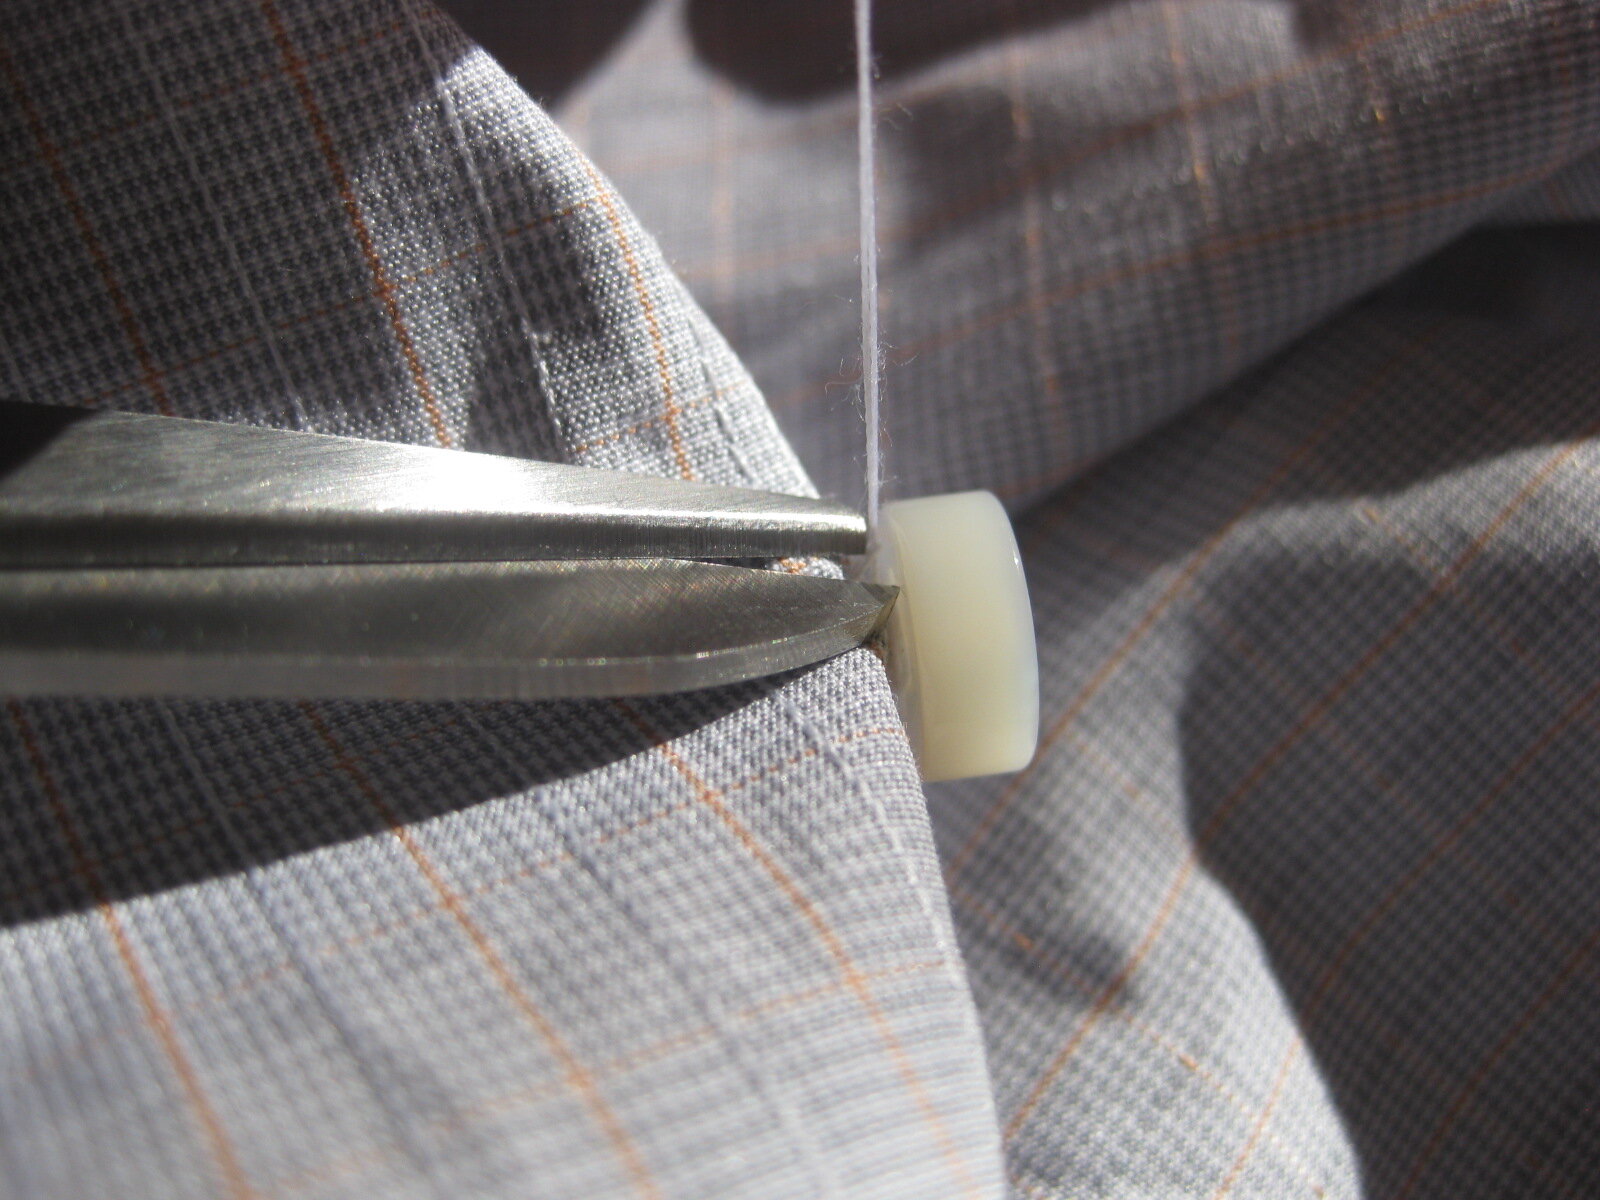
Back up on the outside, remember that little one inch or so of thread we left out there in the beginning? Now is a good time to use some scissors to snip it off close to the shirt, about 1/16 of an inch away or so.
As you advance your skills, you could also snip it earlier in the process, such as right around when the button first gets put onto the thread.

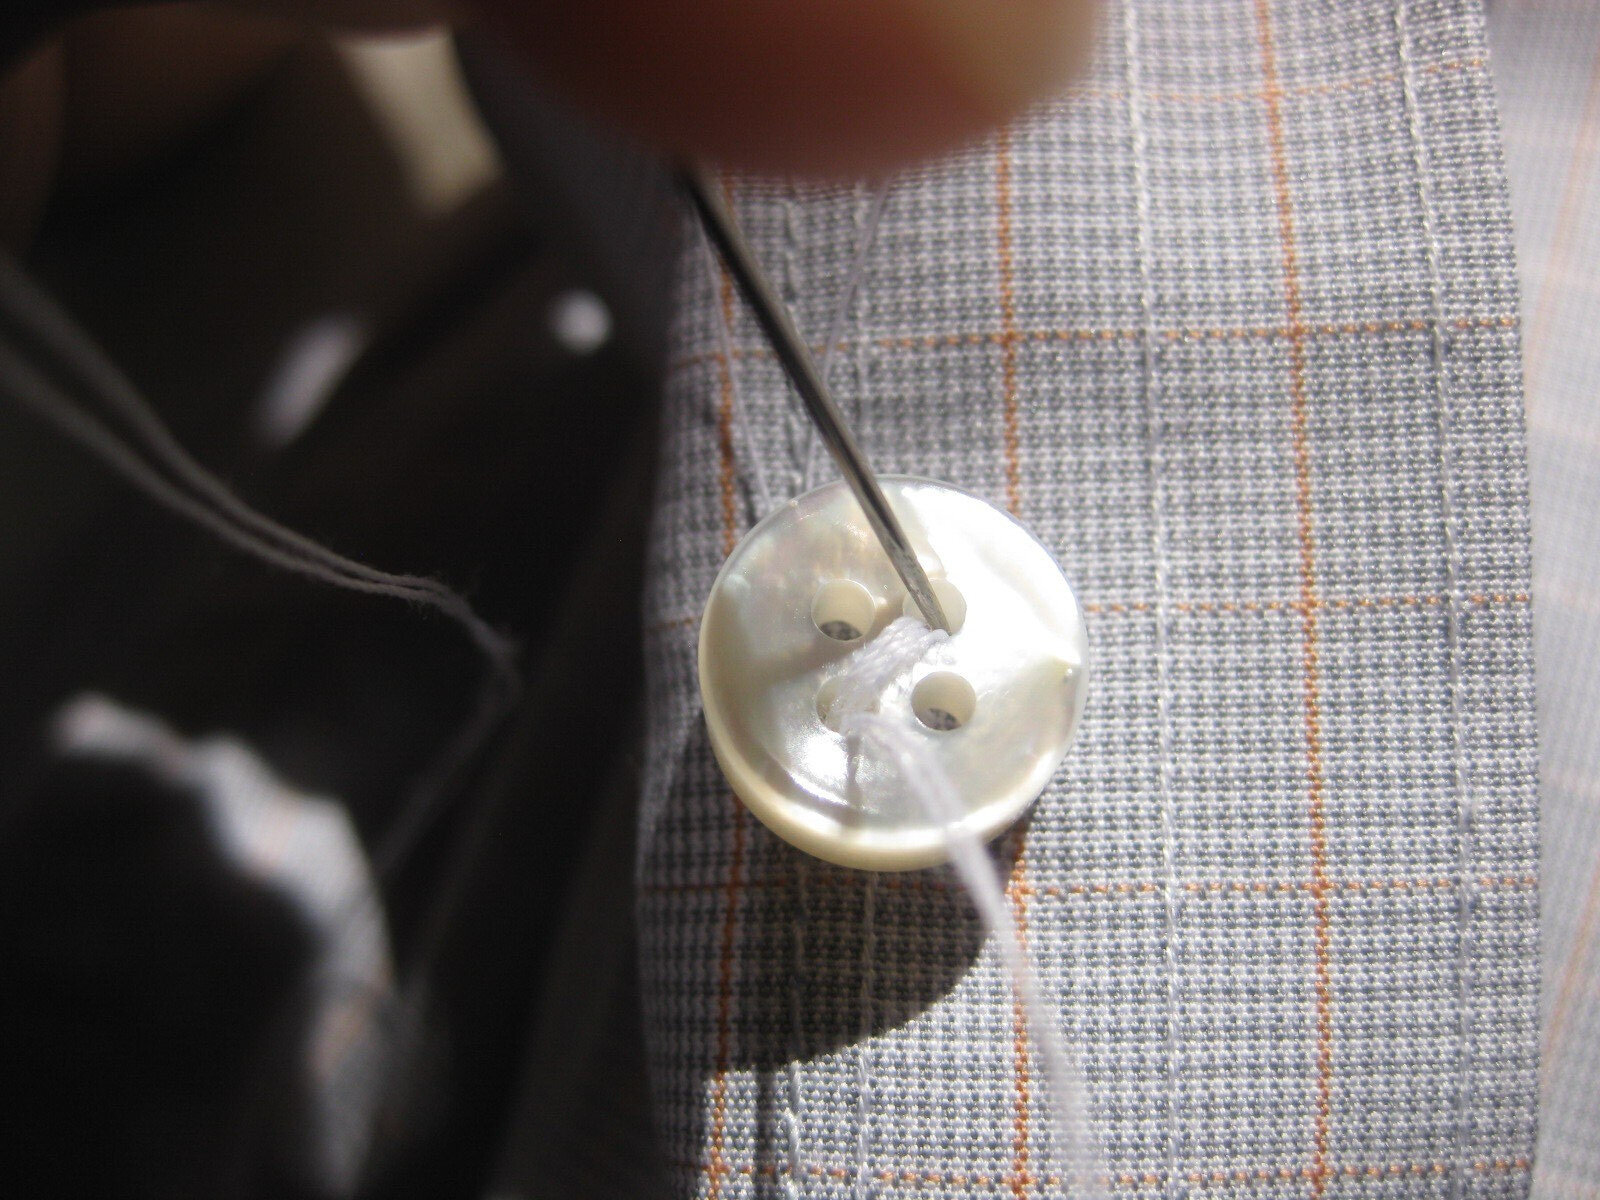
Step 14: Start the Button Shank
Now, all that is left is the shank, or “base”, of the button.
From the inside of the shirt, carefully run the needle through one of the holes, but angle it so that it misses the button and comes out as shown.
Pull the thread all the way through and snug.
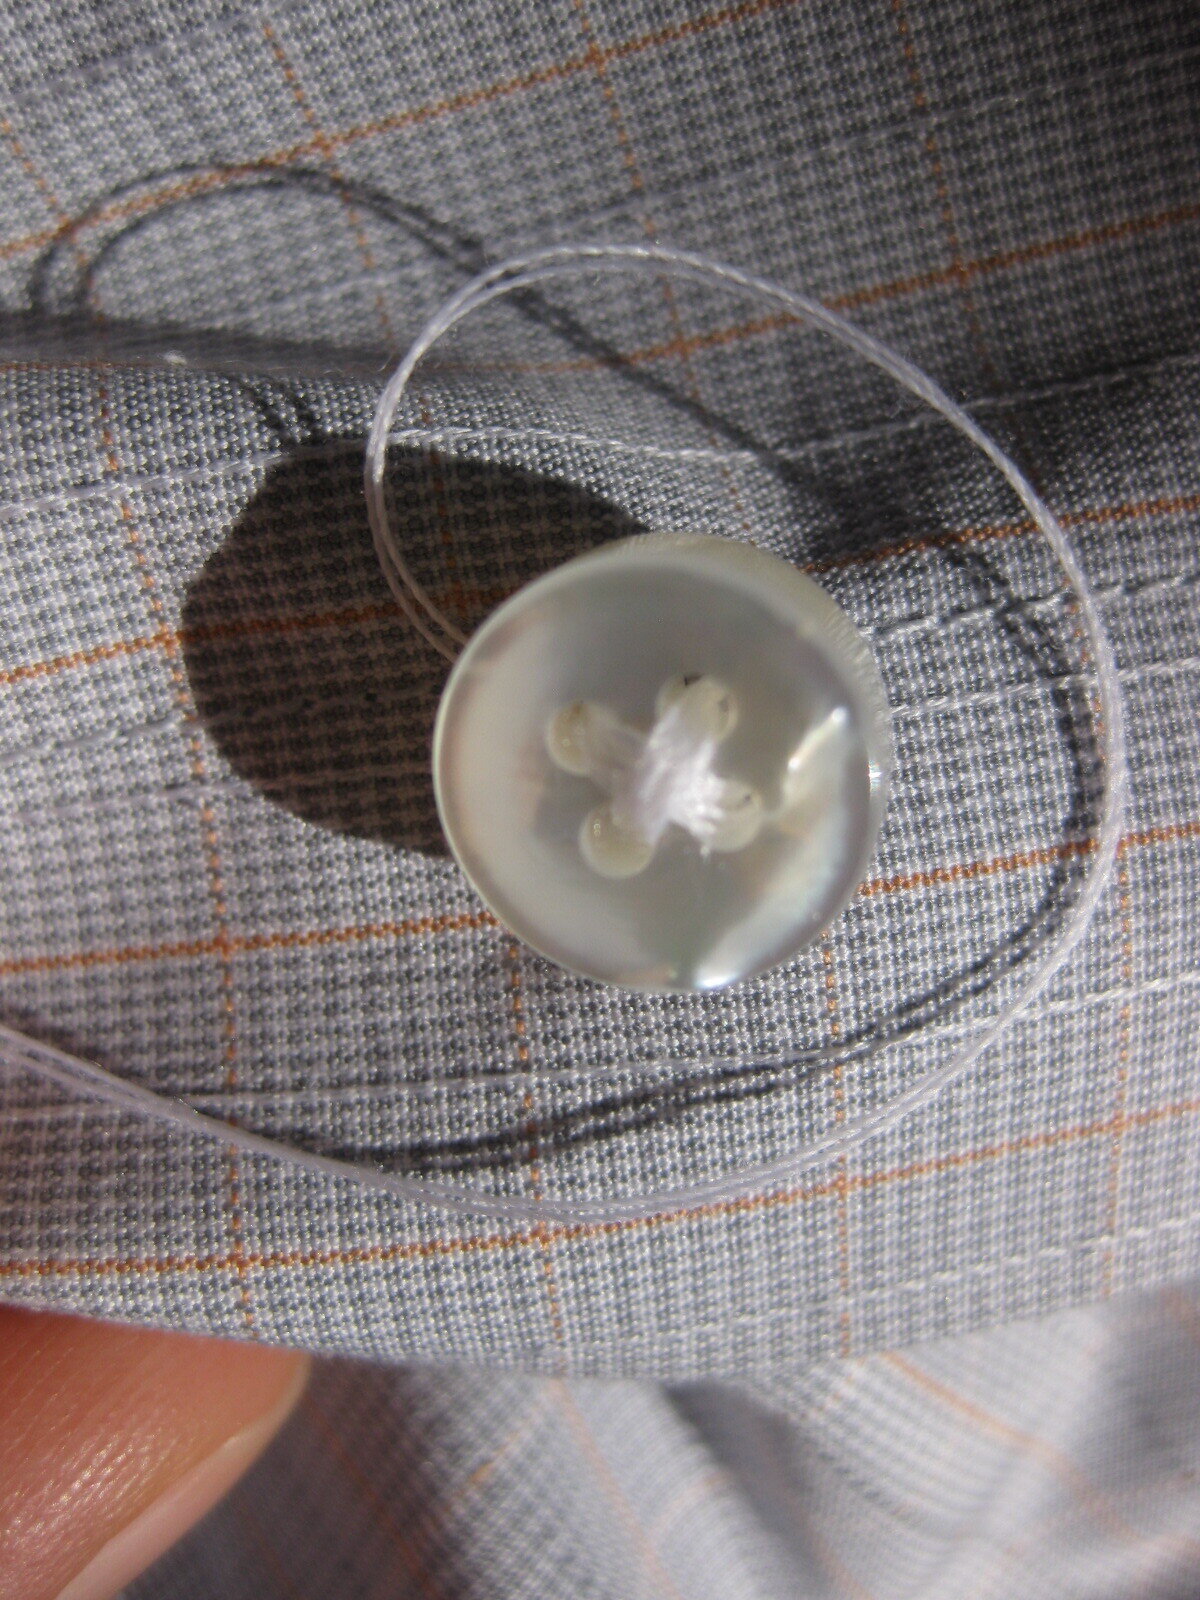
Step 15: Build the Shank
Loop the thread around the button and pull it tight.
Use your fingers to hold the button in place, and a little off the fabric of the shirt, as you continue to wind the thread around the button an pull it tight each time.
Do this about 8 times, making sure to keep pressure on the line so the shank is wound tightly.

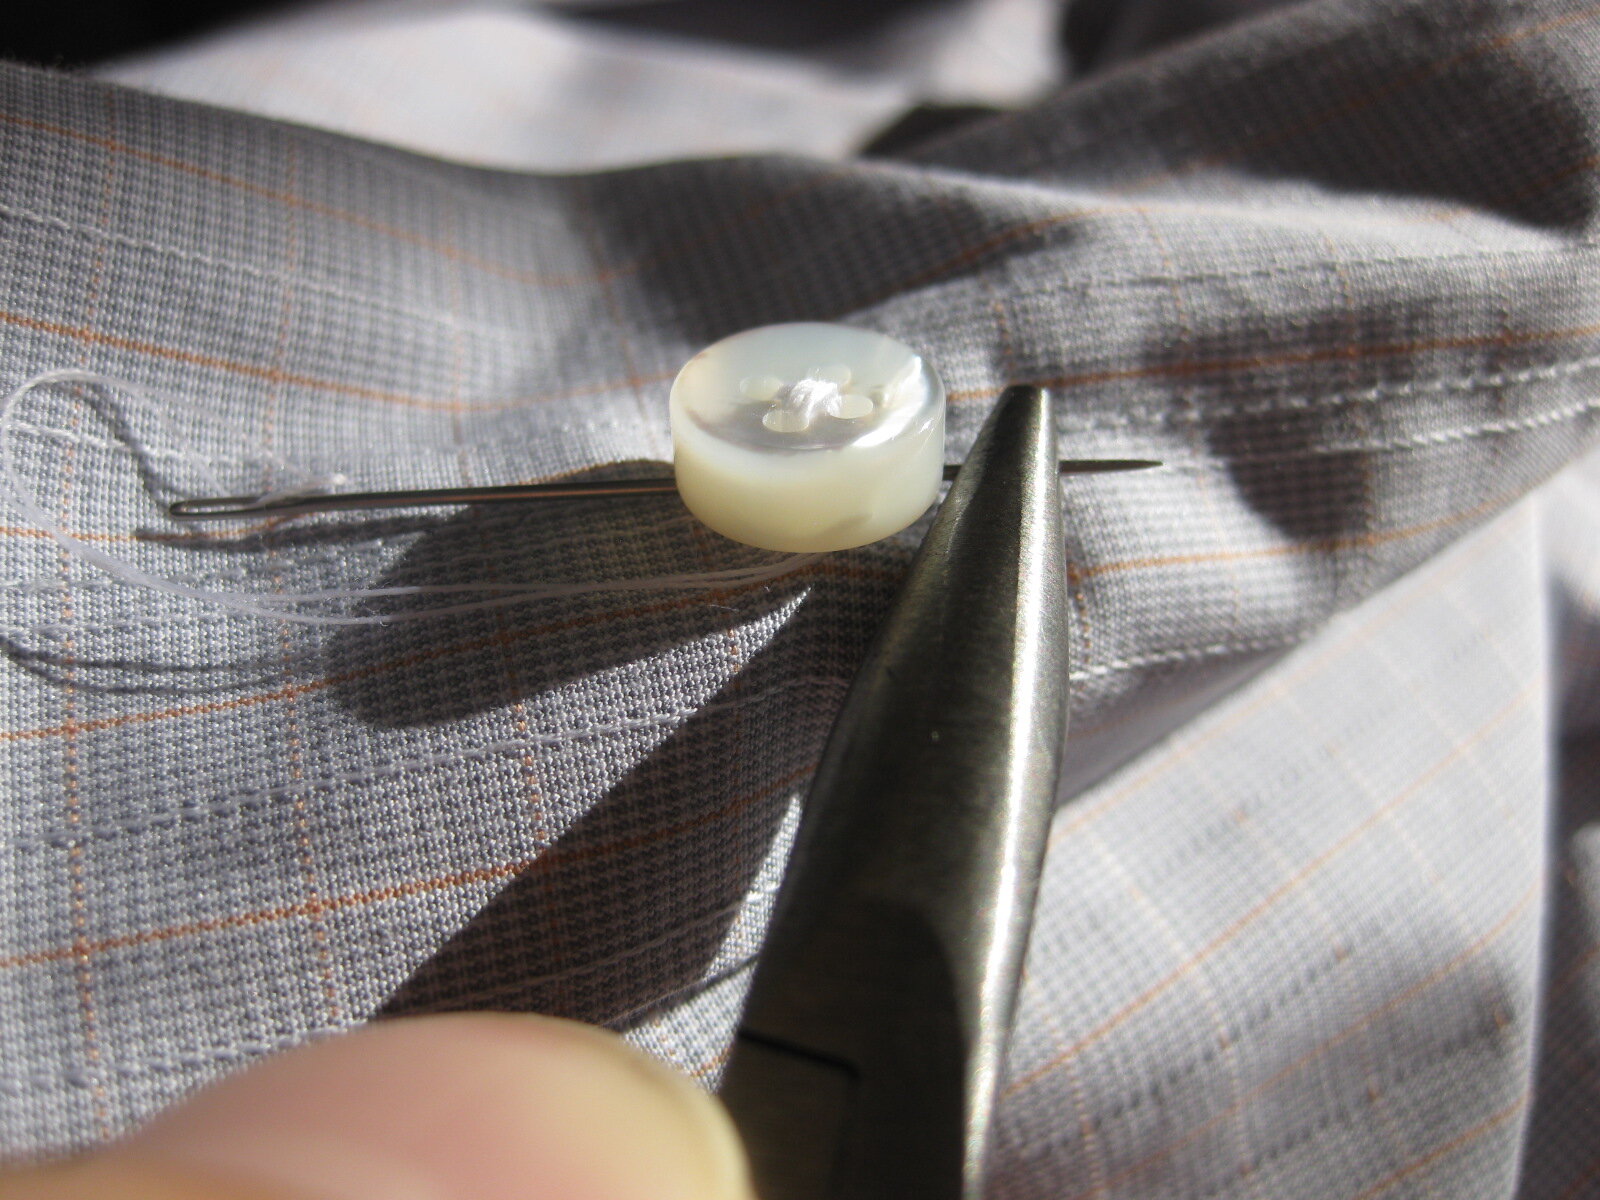
Step 16: Complete the Shank
Now for the finishing touches that lock it all in together.
Push the needle through the center of the shank.
If you have wound the shank tightly, it should be a little difficult to do this step. You can use the thimble or pliers to help.
Step 17: Lock It All Together
Pull the needle through and keep the thread taunt.
Repeat this step three times in total – you should have enough thread if everything has gone as planned!
This is crucial in locking all the thread together and after the shirt is washed it will shrink a little to complete the seal.
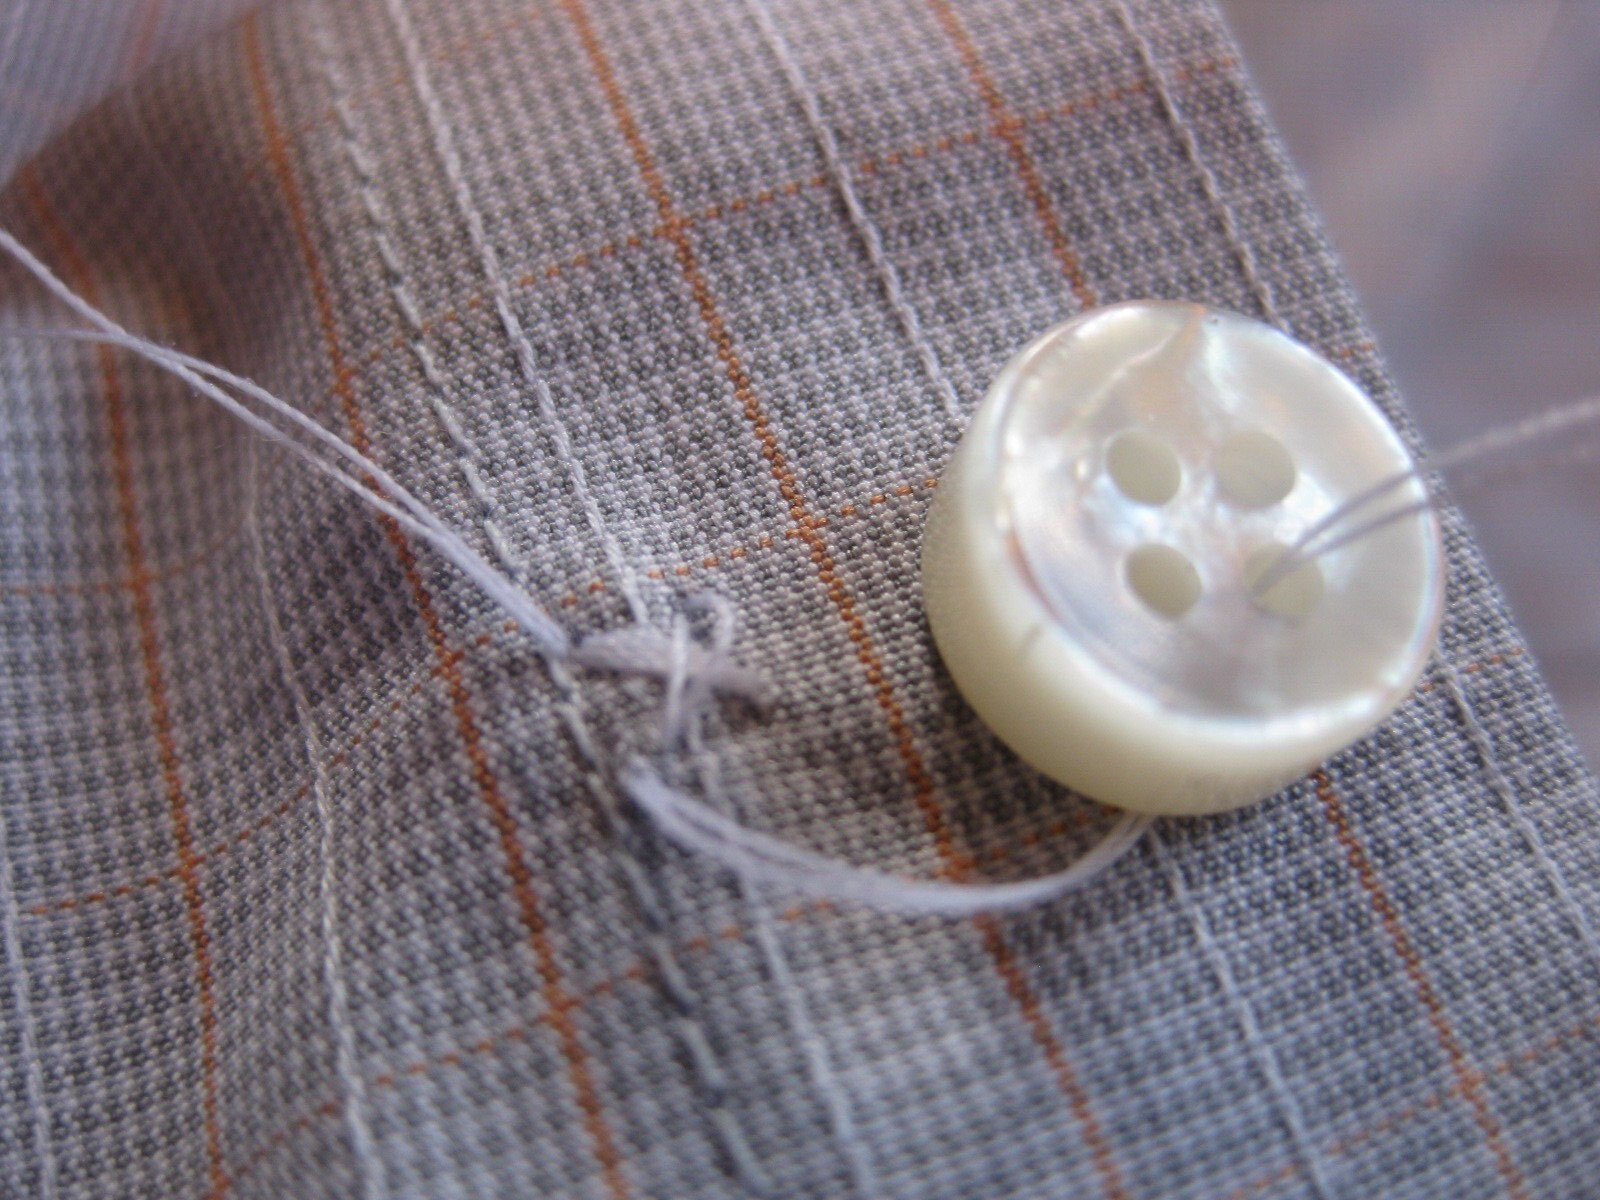
Step 18: Finish the Button Off
Snip the thread close to the button, about 1/16 of an inch away from the shank.

Congrats – You Did It!
Take a moment to admire the shank and the cross-stitching on your new button!
Odds are, this whole process took about 15 to 20 minutes for you the first time. That’s normal and with a little practice it goes quicker.

You’re A Pro!
In the end, you’ll have excellent work that you can be proud of – nearly all of the dress shirts you see do not come with this level of quality stitching!

Stunning!
Just for fun, compare the old plastic button and its stitching to yours – it’s no contest!